警告
本文最后更新于 2024-04-29,文中内容可能已过时。
新购置了NAS,刚好PVE的磁盘不够了,研究通过网络挂载NAS的磁盘到PVE,
但翻遍全网也没找到详细的中文的通过iSCSI把UNRAID上的磁盘挂载到PVE的教程
所以写了此文
SCSI(Internet Small Computer System Interface,发音为/ˈаɪskʌzi/),Internet小型计算机系统接口,又称为IP-SAN,是一种基于因特网及SCSI-3协议下的存储技术,由IETF提出,并于2003年2月11日成为正式的标准。与传统的SCSI技术比较起来,iSCSI技术有以下三个革命性的变化:
- 把原来只用于本机的SCSI协议透过TCP/IP网络发送,使连接距离可作无限的地域延伸;
- 连接的服务器数量无限(原来的SCSI-3的上限是15);
- 由于是服务器架构,因此也可以实现在线扩容以至动态部署。
引用于https://zh.wikipedia.org/wiki/ISCSI
UNRAID
先在unraid上创建一个img
我这里创建的是一个400G的空间
1
|
dd if=/dev/zero of=/mnt/user/PVE-beelink/disk0.img bs=4k count=0 seek=104857600
|
然后输入targetcli进入iscsi target
 1
 2
 3
 4
 5
 6
 7
 8
 9
10
11
12
13
14
15
16
17
|
root@shenghuo2-NAS:~# targetcli
targetcli shell version 2.1.54
Copyright 2011-2013 by Datera, Inc and others.
For help on commands, type 'help'.

/> ls
o- / ......................................................................................................................... [...]
  o- backstores .............................................................................................................. [...]
  | o- block .................................................................................................. [Storage Objects: 0]
  | o- fileio ................................................................................................. [Storage Objects: 0]
  | o- pscsi .................................................................................................. [Storage Objects: 0]
  | o- ramdisk ................................................................................................ [Storage Objects: 0]
  o- iscsi ............................................................................................................ [Targets: 0]
  o- loopback ......................................................................................................... [Targets: 0]
  o- vhost ............................................................................................................ [Targets: 0]
  o- xen-pvscsi ....................................................................................................... [Targets: 0]
/>
|
没有新建的默认状态应该是这样的
第一步
建立File IO Volumes
1
2
|
cd /backstores/fileio/
create name=disk0 file_or_dev=/mnt/user/PVE-beelink/disk0.img
|
成功会显示
1
|
Created fileio disk0 with size 429496729600
|
第二步
新建Target, LUN
1
2
3
4
|
cd /iscsi
create
cd iqn.aaaaaaaaaaaa:xxxxxx/tpg1/luns
create /backstores/fileio/disk0
|
使用create命令会随机生成Target Name,IQN是默认的本机IQN
执行过程类似这样
1
2
3
4
5
6
7
8
9
|
/backstores/fileio> cd /iscsi
/iscsi> create
Created target iqn.2003-01.org.linux-iscsi.shenghuo2-nas.x8664:sn.b80b70b0ba56.
Created TPG 1.
Global pref auto_add_default_portal=true
Created default portal listening on all IPs (0.0.0.0), port 3260.
/iscsi> cd iqn.2003-01.org.linux-iscsi.shenghuo2-nas.x8664:sn.b80b70b0ba56/tpg1/luns
/iscsi/iqn.20...a56/tpg1/luns> create /backstores/fileio/disk0
Created LUN 0.
|
!!! 如果现在直接用iscsiadm连接的话,在fdisk格式化的时候,会显示fdisk: cannot open /dev/sdb: Read-only file system
所以进行第三步
设置acl
需要先去获取PVE的IQN
1
|
cat /etc/iscsi/initiatorname.iscsi
|
结果如下d
1
2
3
4
5
6
7
|
root@beelink:~# cat /etc/iscsi/initiatorname.iscsi
## DO NOT EDIT OR REMOVE THIS FILE!
## If you remove this file, the iSCSI daemon will not start.
## If you change the InitiatorName, existing access control lists
## may reject this initiator.  The InitiatorName must be unique
## for each iSCSI initiator.  Do NOT duplicate iSCSI InitiatorNames.
InitiatorName=iqn.1993-08.org.debian:01:33347ec96f0
|
得到 iqn.1993-08.org.debian:01:33347ec96f0
返回到unraid
1
2
3
4
|
cd ../
set attribute generate_node_acls=1
cd acls/
create iqn.1993-08.org.debian:01:33347ec96f0
|
过程类似
 1
 2
 3
 4
 5
 6
 7
 8
 9
10
11
|
/iscsi/iqn.20...a56/tpg1/luns> cd ..
/iscsi/iqn.20...70b0ba56/tpg1> set attribute generate_node_acls=1
Parameter generate_node_acls is now '1'.
/iscsi/iqn.20...70b0ba56/tpg1> cd acls/
/iscsi/iqn.20...a56/tpg1/acls> create iqn.1993-08.org.debian:01:33347ec96f0
Created Node ACL for iqn.1993-08.org.debian:01:33347ec96f0
Created mapped LUN 0.
/iscsi/iqn.20...a56/tpg1/acls> ls
o- acls .................................................................................................................. [ACLs: 1]
  o- iqn.1993-08.org.debian:01:33347ec96f0 ........................................................................ [Mapped LUNs: 1]
    o- mapped_lun0 ........................................................................................ [lun0 fileio/disk0 (rw)]
|
然后就可以输入
退出了
PVE
检查连通性(optional)
先检查一下能不能discover到unraid的iSCSI
1
|
iscsiadm -m discovery -t sendtargets -p 192.168.123.100
|
这里的-p 是–portal的缩写 指向iSCSI initial
192.168.123.100也就是填unraid的IP
能看到刚才我们新建的target就行
连接iSCSI target
1
|
iscsiadm -m node -T iqn.2003-01.org.linux-iscsi.shenghuo2-nas.x8664:sn.b80b70b0ba56 -p 192.168.123.100 -l
|
显示successful即可
可以使用 iscsiadm -m session -R 检查所有active的连接
设置开机自启
1
|
iscsiadm -m node -o update -n node.startup -v automatic
|
分区
fdisk的使用我就不细写了,不会的可以自己查
 1
 2
 3
 4
 5
 6
 7
 8
 9
10
11
12
13
14
15
16
17
18
19
20
21
22
23
24
|
root@beelink:~# fdisk /dev/sdb

Welcome to fdisk (util-linux 2.36.1).
Changes will remain in memory only, until you decide to write them.
Be careful before using the write command.

Device does not contain a recognized partition table.
Created a new DOS disklabel with disk identifier 0xddd71883.

Command (m for help): n
Partition type
   p   primary (0 primary, 0 extended, 4 free)
   e   extended (container for logical partitions)
Select (default p): p
Partition number (1-4, default 1): 1
First sector (16384-838860799, default 16384):
Last sector, +/-sectors or +/-size{K,M,G,T,P} (16384-838860799, default 838860799):

Created a new partition 1 of type 'Linux' and of size 400 GiB.

Command (m for help): w
The partition table has been altered.
Calling ioctl() to re-read partition table.
Syncing disks.
|
EXT4格式化(推荐)
对磁盘进行EXT4格式化,可以支持更大的文件和卷,以及更多的特性
创建/NAS-iSCSI文件夹,把盘挂载到NAS-iSCSI目录下
具体名字可以自己设置
1
2
|
mkdir /NAS-iSCSI
mount /dev/sdb1 /NAS-iSCSI/
|
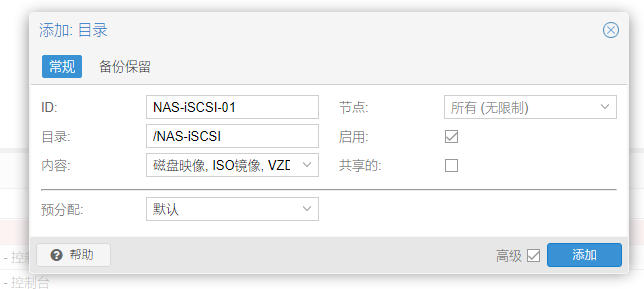
在PVE webUI以目录格式挂载
进入 数据中心-存储
选择 添加-目录

id可以随便填,目录选择刚才挂载的目录
内容自己选择

大功告成🎉🎉🎉

也可以挂载为LVM,在fdisk分区的时候设置即可

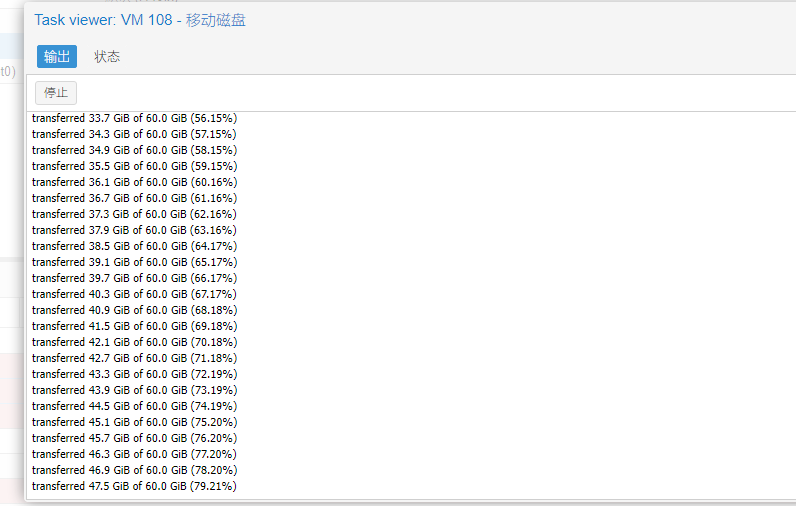
迁个虚拟机


